This tutorial walks through one complete path—Text cursor, custom label view, tweaked Style, and sane Advanced defaults—exactly along the numbered flow in Ultimate Cursor (Cursors screen → General Settings).
Step 1: Open the Plugin and Select Text
- In WordPress admin, open Ultimate Cursor.
- In the plugin header tabs, choose Cursors (your version number in the title bar may differ from v2.2.1).
- Open the General Settings sub-tab (not Multiple Cursors, which is PRO).
- Under Select Cursor Type, click the Text card — Replace cursor with text.
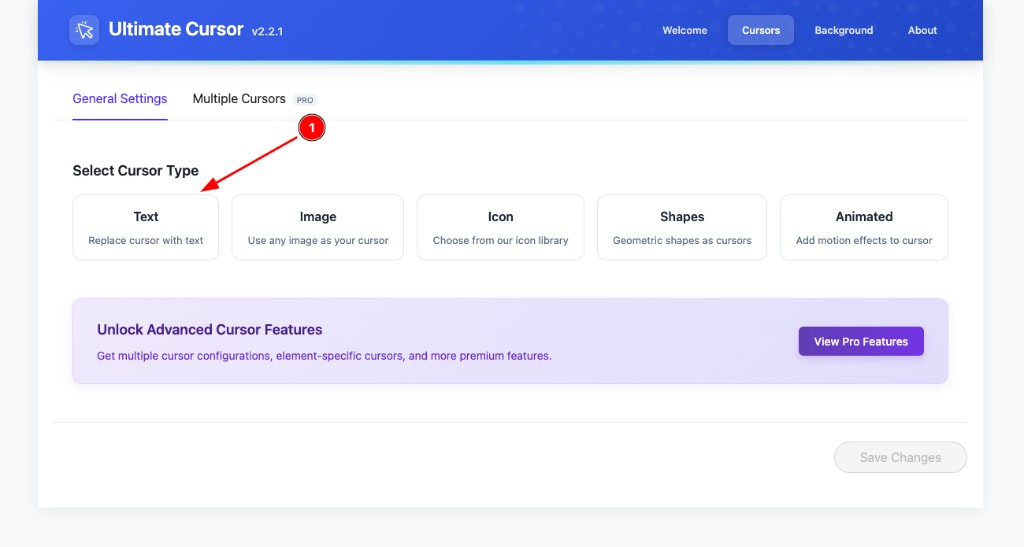
You can pick Image, Icon, Shapes, or Animated later; this guide sticks with Text for the smallest first win.
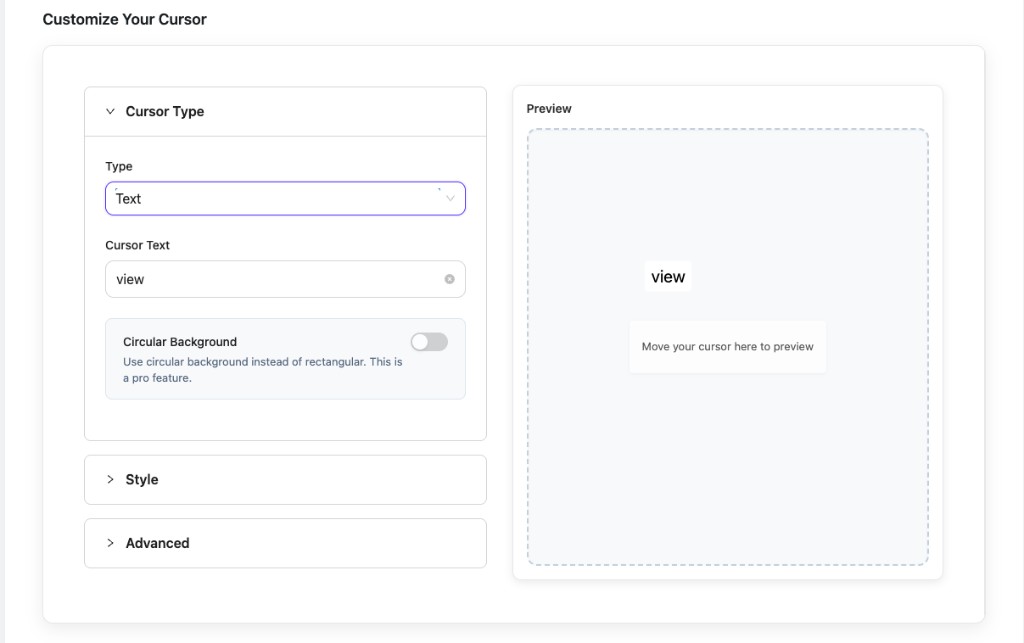
Step 2: Cursor Type Controls and Preview
Scroll to Customize Your Cursor. Expand Cursor Type and set:
| Control | What to do |
|---|---|
| Type | Text (matches your card choice). |
| Cursor Text | Enter the label that follows the pointer — e.g. view for a shop or portfolio CTA. |
| Circular Background | Optional; when on, uses a round badge instead of a rectangle. Shown in the UI as a Pro option. |
Keep Style and Advanced collapsed for the moment. On the right, the dashed Preview region shows a live sample; use Move your cursor here to preview to validate the label.
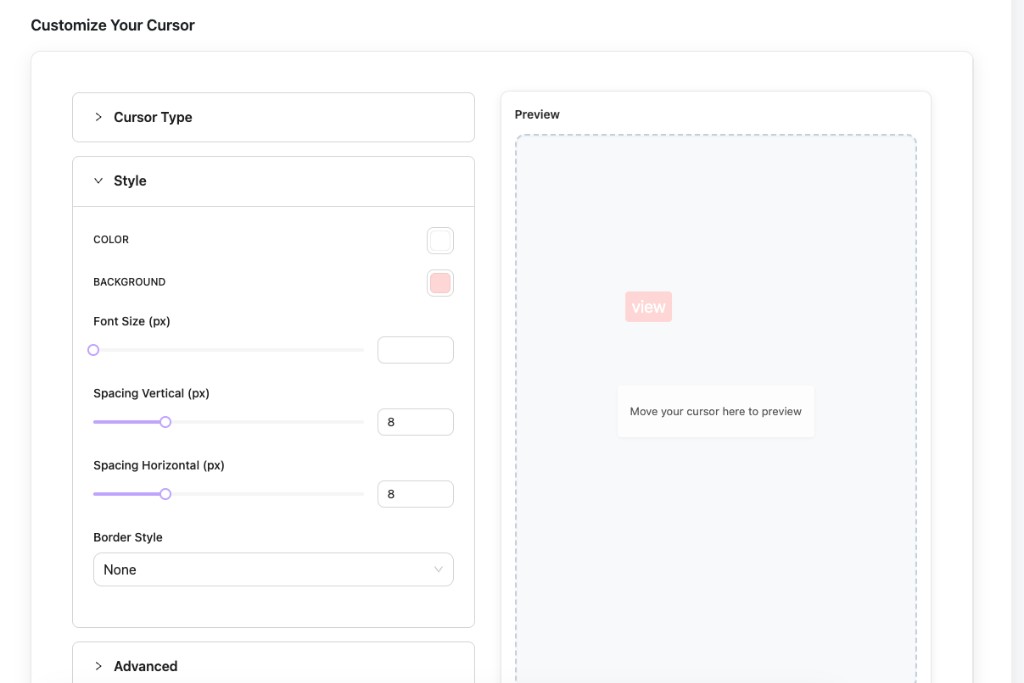
Step 3: Style Colors Spacing and Border
Expand Style and tune how the label reads on your theme:
- COLOR — text / glyph color (try high contrast against the background).
- BACKGROUND — fill behind the label (e.g. a soft brand tint).
- Font Size (px) — size for the text cursor; adjust the slider or type a value.
- Spacing Vertical (px) and Spacing Horizontal (px) — padding inside the badge (the walkthrough UI often starts around 8 / 8).
- Border Style — e.g. None for a flat chip, or a border preset when you want separation.
The preview updates as you go; you should see the label pick up your colors and spacing.
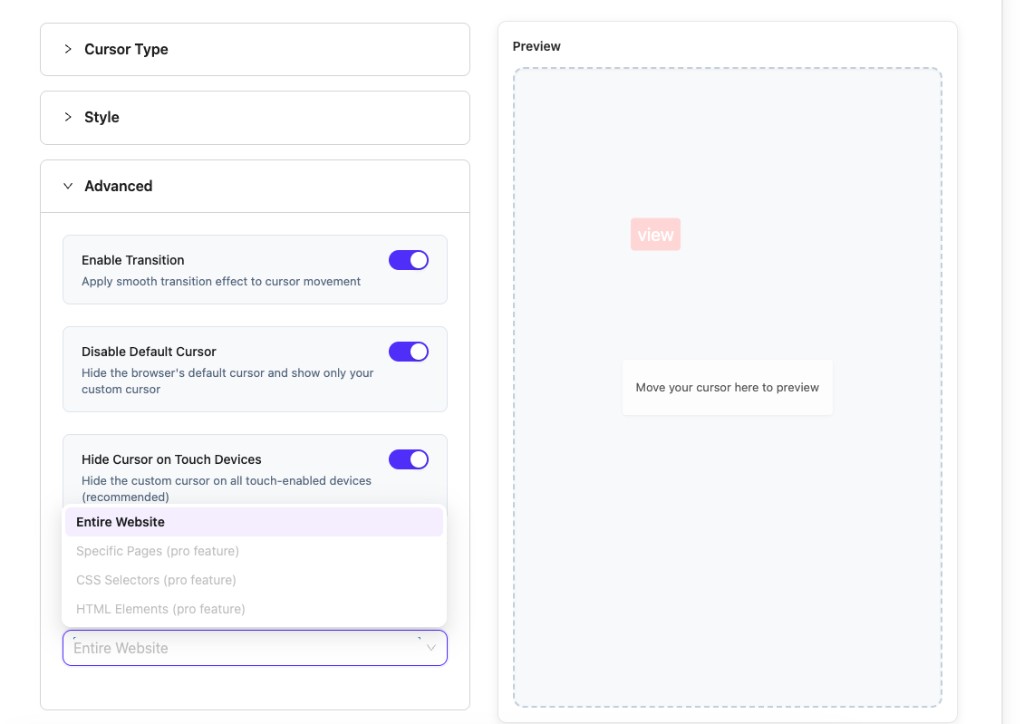
Step 4: Advanced Behavior and Targeting
Open Advanced and choose how the custom cursor behaves:
| Toggle | Purpose |
|---|---|
| Enable Transition | Smooth follow motion instead of hard snapping. |
| Disable Default Cursor | Hides the system pointer so only your custom cursor shows. |
| Hide Cursor on Touch Devices | Skips the effect on touch hardware (recommended). |
Under the accordions, use the Apply Cursor On (or equivalent scope) menu:
- Entire Website — available to everyone; good default for a first test.
- Specific Pages, CSS Selectors, and HTML Elements — marked as pro in the menu and stay disabled until you run a Pro license.
Step 5: Save Changes and Test the Front End
- Click Save Changes (it enables after you modify something).
- Visit your site in a normal browser window (not the admin).
- Move the mouse: you should see your text cursor with the colors and motion you set.
- On a phone or tablet, confirm the cursor stays hidden if Hide Cursor on Touch Devices is on.
If nothing updates, clear caches (browser + any WordPress performance plugin) and confirm Entire Website (or your Pro scope) includes the page you are testing.
What to Read Next
- Quick Setup — Full tour of every accordion and Apply Cursor On
- Understanding Cursor Types — When to switch from Text to Image, Icon, Shapes, or Animated
- Text Cursor — Deeper ideas for typography and layout
Need help? See Common Issues or contact support.