This walkthrough matches the Ultimate Cursor WordPress admin: start on General Settings, open Customize Your Cursor, use the accordion sections and preview, then save.
Step 1: Open Ultimate Cursor in the Admin
- Go to Ultimate Cursor in the WordPress admin sidebar.
The main settings area uses tabs at the top. Stay on General Settings first (the tab next to it, Multiple Cursors, is a Pro-only area).
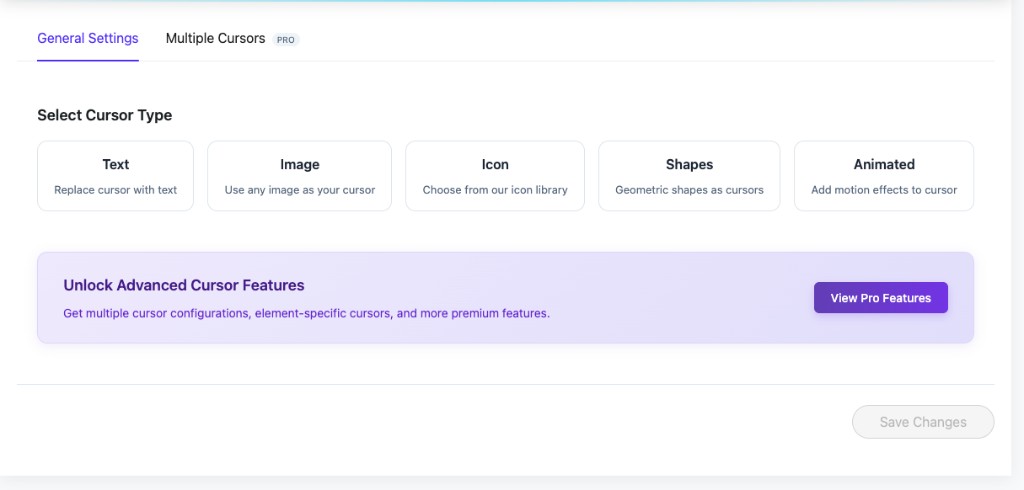
Step 2: Pick a Cursor Type on General Settings
Under Select Cursor Type, choose one mode for your site:
| Type | Purpose |
|---|---|
| Text | Show custom text instead of the default cursor |
| Image | Use any image file as the cursor |
| Icon | Pick from the built-in icon library |
| Shapes | Simple geometric shapes |
| Animated | Cursor with motion styles |
Premium options such as multiple cursor configurations live under the Multiple Cursors tab. The purple banner (Unlock Advanced Cursor Features / View Pro Features) points to those upgrades.
Nothing is finalized until you press Save Changes at the bottom of the screen—use it after you finish configuring.
Step 3: Fine-Tune Cursor Type Options
Below the tabs, Customize Your Cursor splits into a left settings column and a right Preview panel. Expand Cursor Type to configure the active mode—for example when Text is selected:
- Type — dropdown for the cursor kind (matches your top-level selection).
- Cursor Text — the label shown when using text mode (there is usually a clear control on the field).
- Circular Background — optional rounded background behind the label; labeled as a Pro feature.
- Move the pointer inside the dashed Preview area to see changes live (Move your cursor here to preview).
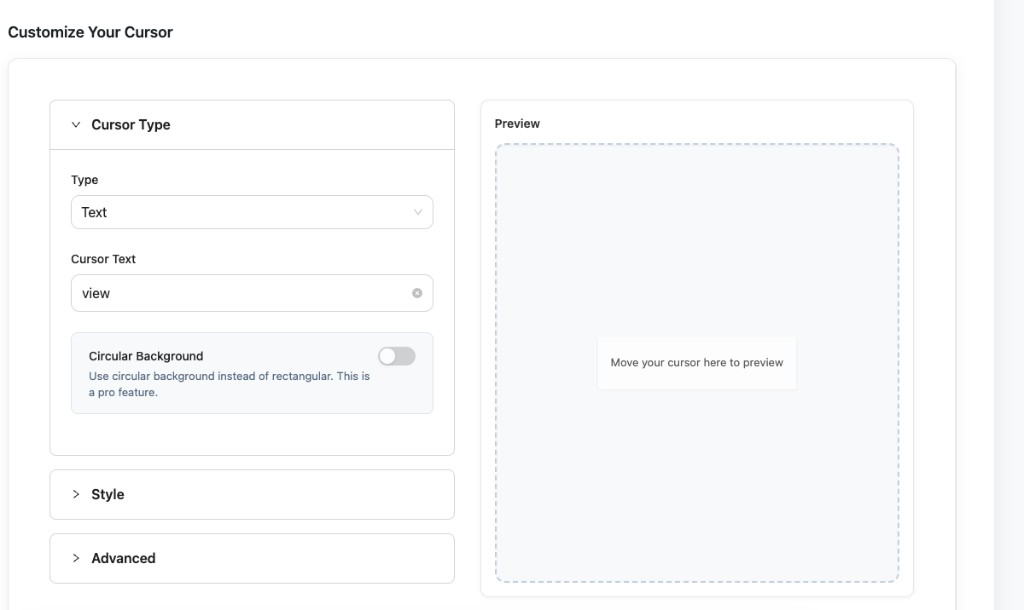
Expand Style and Advanced when you’re ready—the next steps describe what you’ll find there.
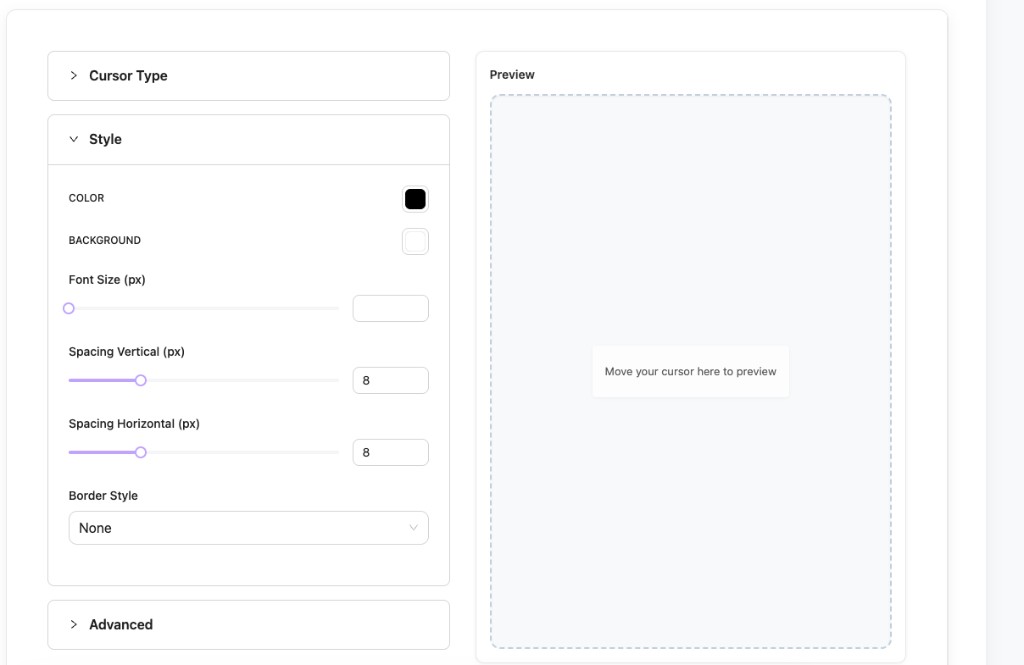
Step 4: Adjust Style Colors and Spacing
In the Style section you’ll see:
- COLOR — main cursor / text color
- BACKGROUND — background fill color
- Font Size (px) — size for text-based cursors (slider + numeric field)
- Spacing Vertical (px) and Spacing Horizontal (px) — padding around the label
- Border Style — border treatment (for example None or other preset options)
Use the Preview column again to confirm colors, spacing, and borders before saving.
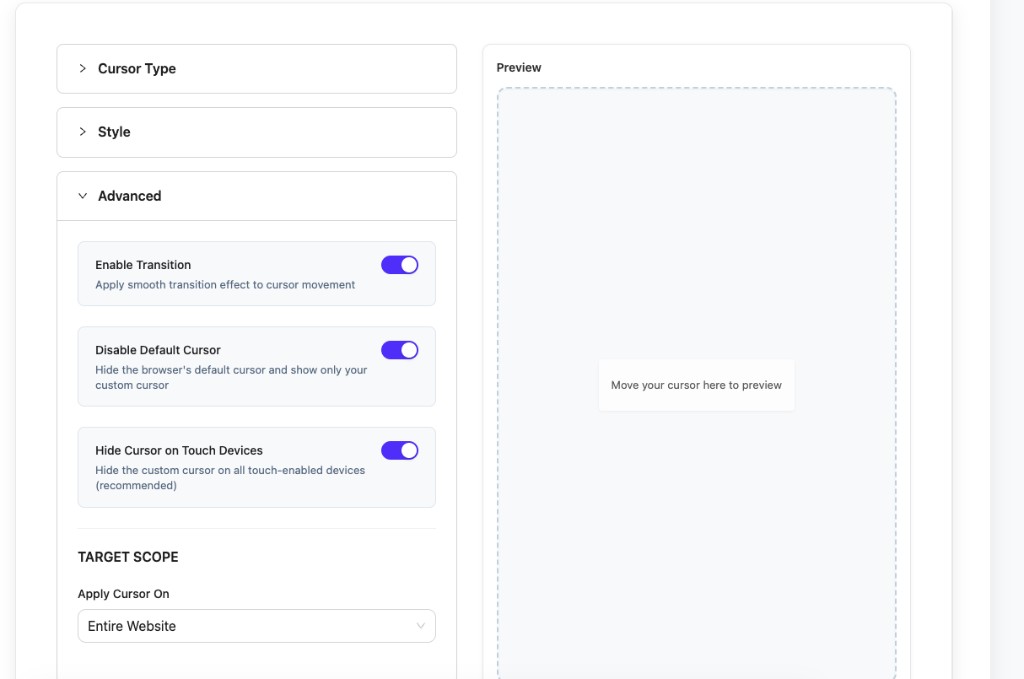
Step 5: Review Advanced Behavior and Scope
Open Advanced to control how the custom cursor behaves:
- Enable Transition — smooth movement as the cursor follows the pointer (instead of snapping).
- Disable Default Cursor — hides the browser’s native cursor so only your custom one shows.
- Hide Cursor on Touch Devices — turns the custom cursor off on touch hardware (recommended for phones and tablets).
Below the accordions, Apply Cursor On sets where the effect runs—for example Entire Website from the dropdown.
Step 6: Save Changes and Preview on Your Site
- Click Save Changes when you’re happy with the configuration (the control is at the bottom of the settings screen).
- Open your site’s front end in a new tab.
- Move the mouse (or trackpad) and hover links and buttons to confirm the cursor looks right.
- Return to Ultimate Cursor any time to tweak options and save again.
Pro Tips
Start simple — pick one cursor type and a clear color before adding borders, motion, or Pro-only options.
Touch devices — keeping Hide Cursor on Touch Devices enabled avoids awkward behavior on phones and tablets.
Scope — if something looks wrong on one page only, check Apply Cursor On and any Pro rules for page- or element-specific cursors.
Common Adjustments
Cursor not visible on the front end
- Confirm Save Changes completed without errors.
- Try increasing COLOR contrast or Font Size in Style.
- If the default pointer still shows, review Disable Default Cursor in Advanced and clear site or browser cache.
Motion feels too snappy or too floaty
- Toggle Enable Transition in Advanced and test again in the preview box.
Too much padding around text
- Lower Spacing Vertical and Spacing Horizontal in Style.
What's Next?
- Text Cursor — More ideas for text-based cursors
- Particle Effects — Trail and effect options
- Conditional Logic — Different cursors for different contexts
Questions? See Troubleshooting or contact support.